I know, I know, I said I'd have this up in a week and it's been more like a month...
So this post is a follow up to my last post: Way Too Long Annual Update - Part 1 and is entirely house and work based. If you're interested in life on the island and Islay itself, the post above is the one you're after. If you're new to the blog or are revisiting and need a bit of a back story first, the next two links are summaries of life and the house up until now:
Or if you want to go right back to the beginning, 2 years ago now, have a look at Mary-Ann's first ever post, which amazingly has had nearly 2000 views so far:
It seems like a ridiculously long time ago now that the Dower House was just a faint memory and a picture on the computer screen. Gary asked us a few days ago whether we wished we were still back in our old lives in Dorset, and the honest truth is that no, none of us would at all. I can't even remember what I did with myself before I started working 50 hours a week, I'd definitely be incredibly bored if I tried to go back to it. There's certainly things we'd all do differently if we could, like living in a freezing cold room last winter, with drafts everywhere and rats in the walls, that wasn't fun, but then again, it's all experience.
This is the house now. The final new window on the front went in yesterday, on the bottom left. It's starting to look quite smart. At least it will once the front of the garden is sorted out a bit more.
Befores and Afters
Porch

I'd actually forgotten what the porch used to look like until I found this.
Even unfinished, it's much better now.
Doors into the separate houses, final door into our half on the right, and temporary door on the left.
Cassie saw me put on my coat and thought we were going for a walk, so followed me around while I took the photos and managed to sneak her way into almost all of them!
Sandy & Tom's Side
Sitting Room

'The blue room'
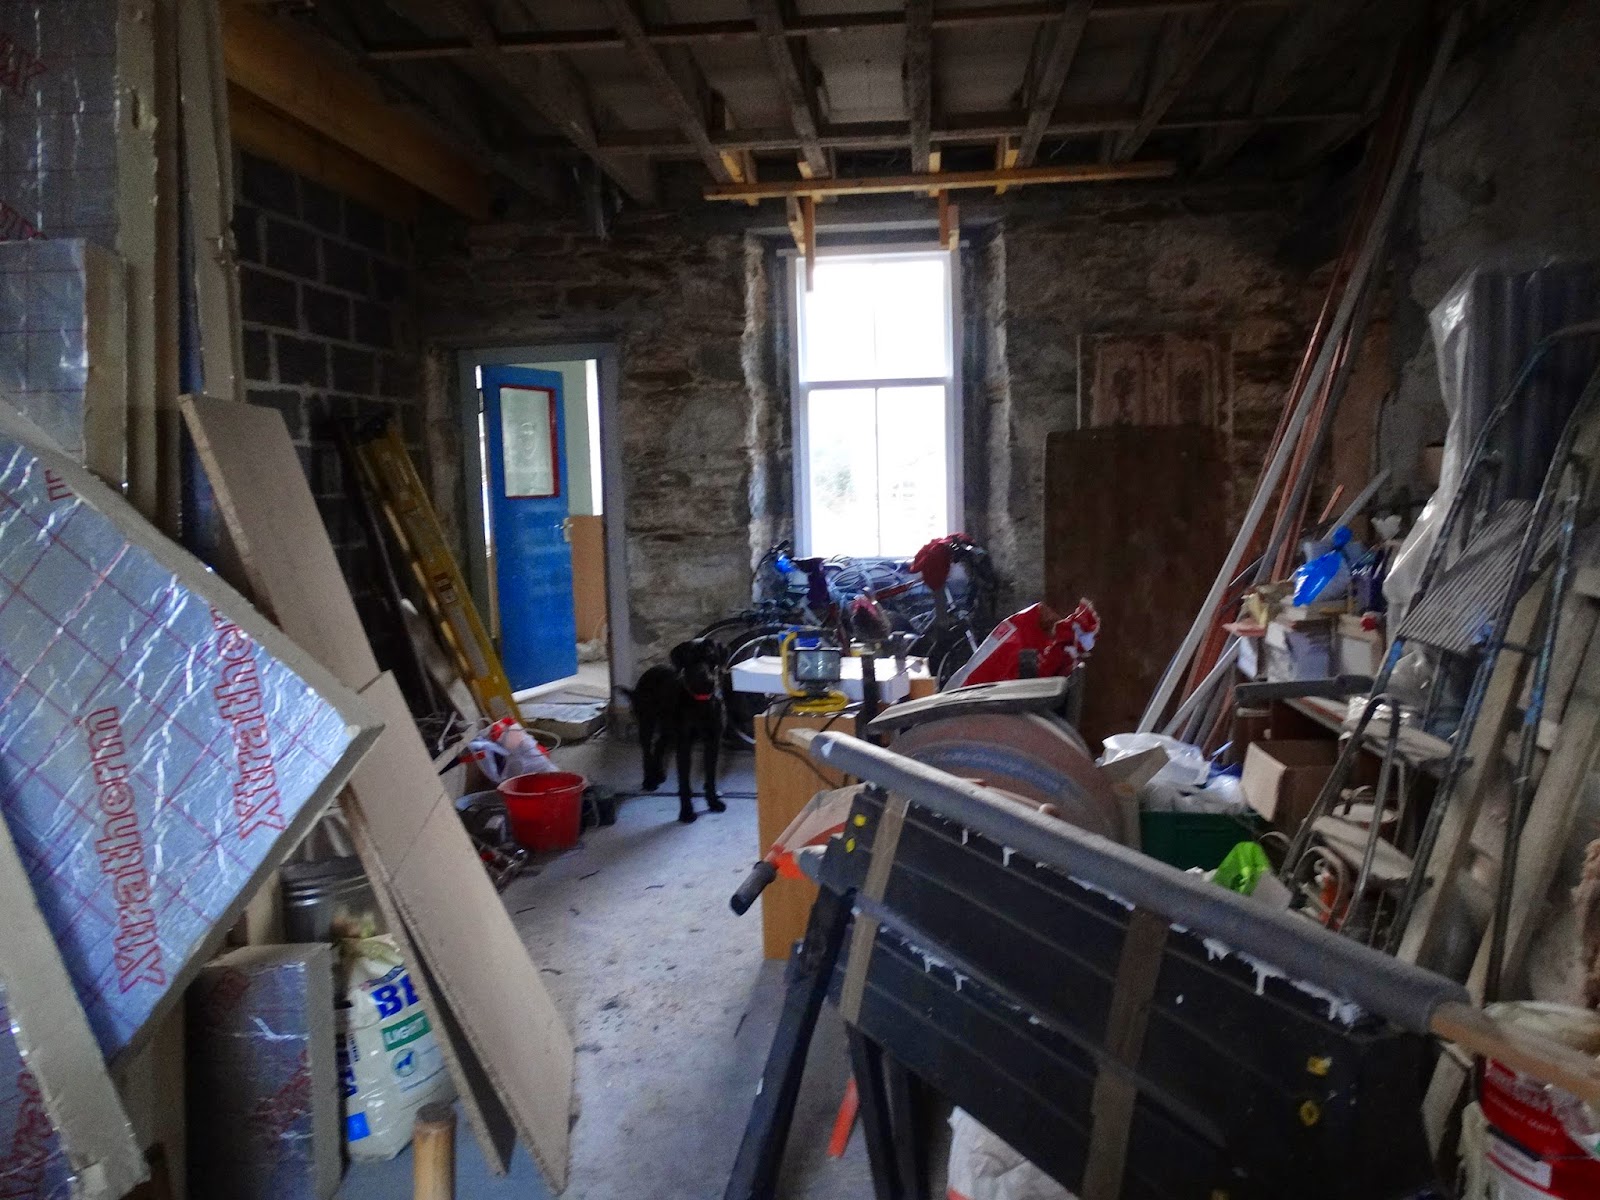
Before we stripped it out, this room played the role of bedroom, office, sitting room , and occasionally kitchen!

It's barely recognisable now...
This room has all the tools, materials and general mess from the rest of the house in it at the moment... I'll clear it out soon, I promise!
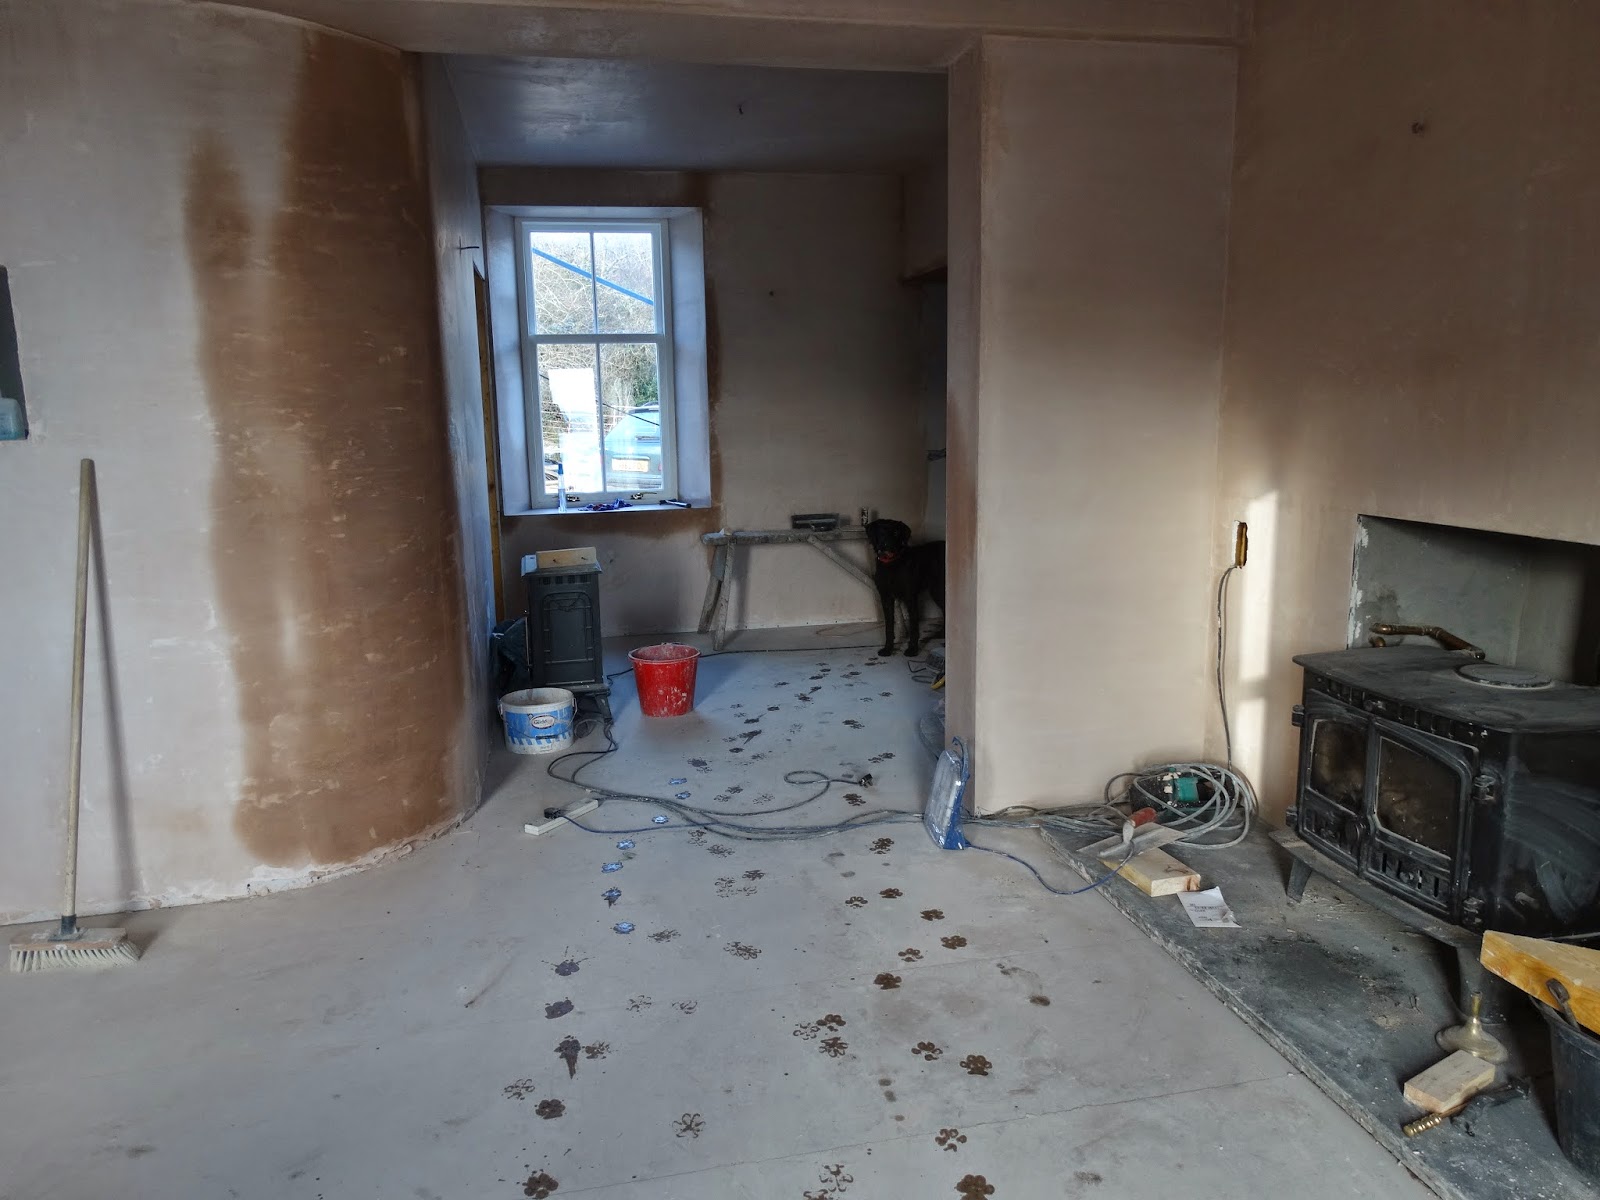
We haven't done a massive amount to it since last year. The floor was dug out and concreted, the diving wall built up the right hand side, and then Gary built the two pillars on either side which support the beam. Originally we were going to use RSJs (rolled steel joists) for this, but after trying to get them to the island for 2 months, we decided to use 9''x3'' instead. We've bolted 4 together and they are fixed into the walls on either side, which should be just as good as the RSJ.
Kitchen/ Dining Room

This is a terrible photo, and I'd forgotten how much stuff we'd managed to cram into one room, but you get the idea.. It was damp, dank and cluttered.
Now it's a bit less damp, dank and not cluttered at all.
We only actually laid the concrete a few days ago.
When we built the dividing wall, it cut off Sandy and Tom's upstairs from the stair case, as the stairs are built on our side. At the moment we have a temporary ladder that Gary knocked up in 10 minutes!
Shower Room
This is what it looked like a year ago. In between then and now it became a temporary kitchen. And yes, it is very bizarre cooking dinner with a toilet in the corner...
We've opened up this door temporarily, it was a false door and will be again, I think. It will save us having to walk through the porch with dirty wheelbarrows when it is completed.
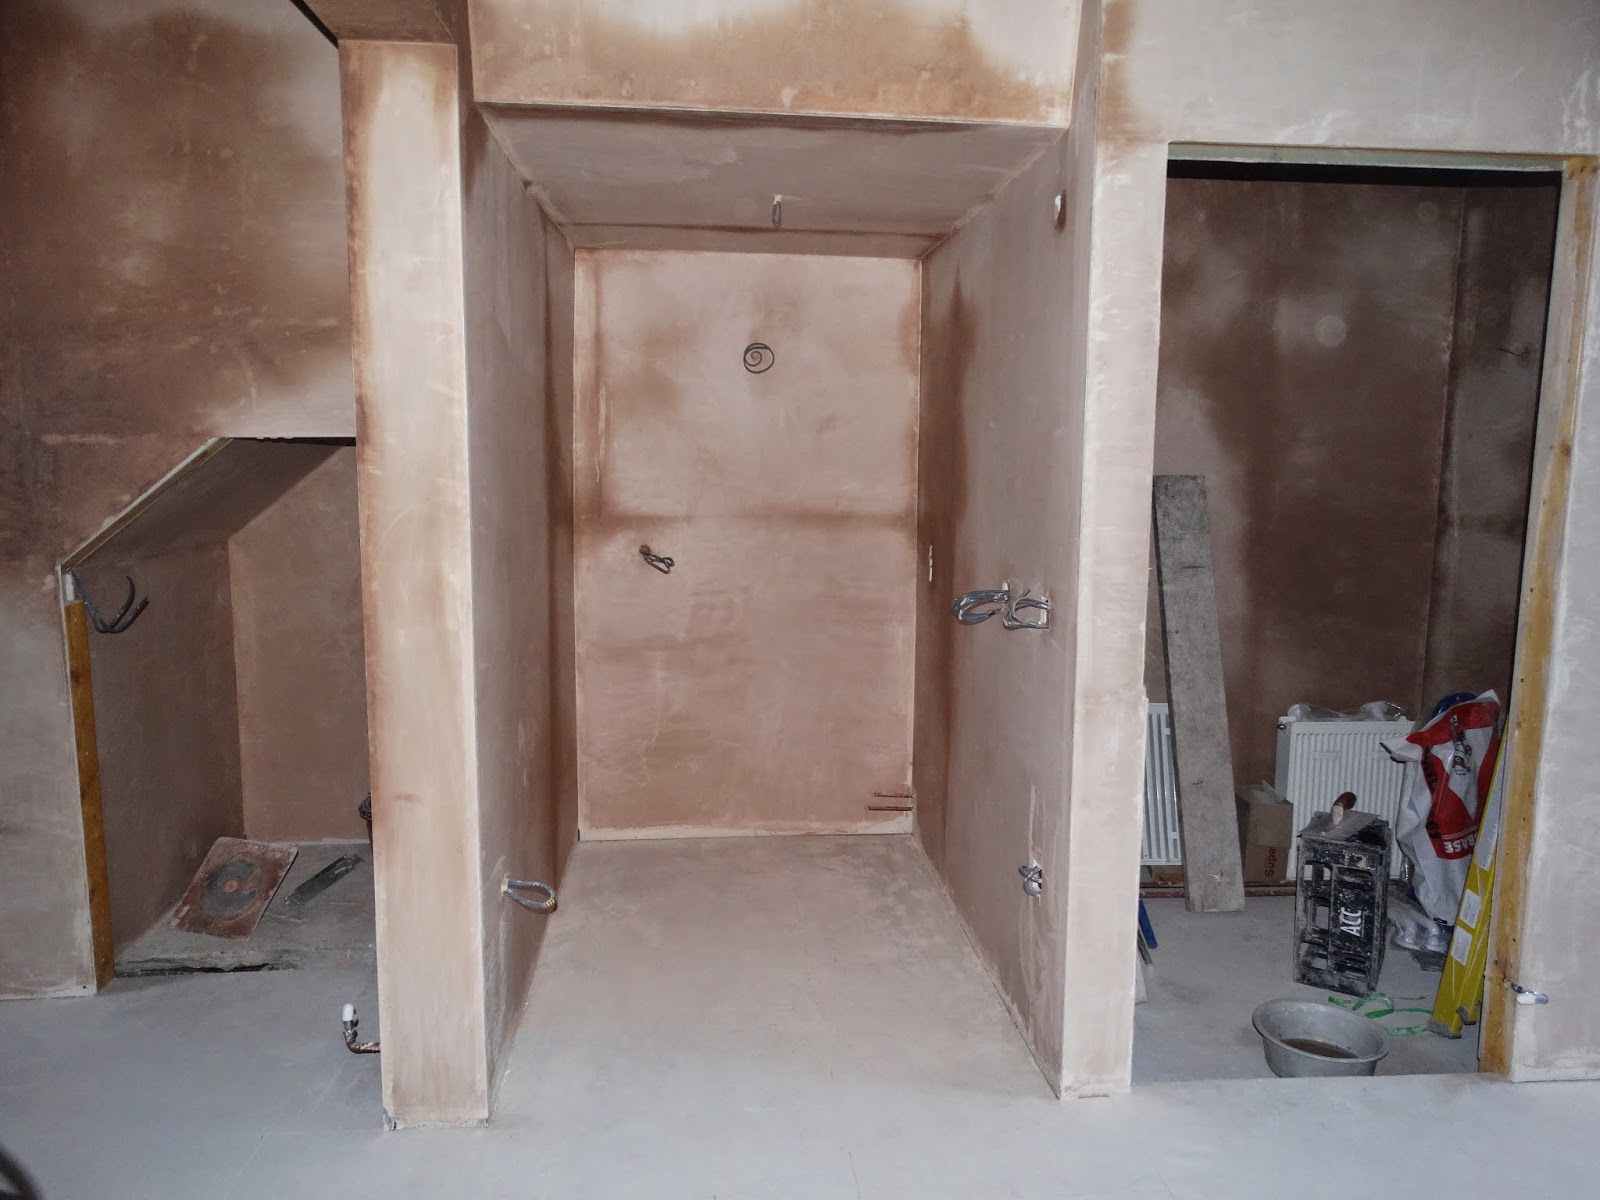
The shower room is located in the end shed, right on the far left of the house. The shower room is going to be in one half of the sheds and the other will be a utility room. I didn't take any photos of the other side as it's a pretty disgusting old toilet that hasn't changed hardly at all since we moved in! We're leaving it in place for the time being as otherwise we'll have to tramp upstairs in our muddy boots to get to a toilet, which won't be ideal when we have new floors down.
Bedroom 1
Stud walling was just starting to go up.
It is now divided into rooms and plaster boarded.
The floor is cut out at the far end for the staircase, which will be boxed in.
Temporary staircase.
Bedroom 2 and Main Bathroom
Some of the old floorboards were starting to come up at this stage.
Now with plaster boarded walls and chipboard floors.
I need to get rid of all those plaster board off cuts..
Main Bathroom
This bathroom is going to be amazing, it's so big. The cupboard will be an airing cupboard.
Bedroom 4
The pink wall was solid, so we've left it in place.
The 4th bedroom was full of insulation...
The stack of insulation is now inside the walls, and in its place is an en-suite bathroom.
All of Sandy and Tom's bedrooms are really good sizes, with views out over the sea or onto the Fairy Hill.
Bedroom 3
I don't know how I managed to put bedroom 4 before 3..
One of the first things Gary did for us inside was replace the old brick wall, which was practically falling down with a block wall built up from the ground floor.
A disused fireplace.
We boarded over the fireplace as it wasn't being used. It is now the back wall of an ensuite bathroom. (Currently full of electrical supplies)
Gary and I put the framework up in this bedroom a couple of weeks ago, whilst waiting for more materials for our side.
It all looks so different now, it's quite hard to match the before room with after room!
The Corridor
Back then you could see right down to our end of the house.
Now there's a dividing block wall between the two houses.
OUR SIDE
Main Room and Kitchen
Tomorrow we're starting to lay a patio using the slates from this floor.
Spot Cassie...
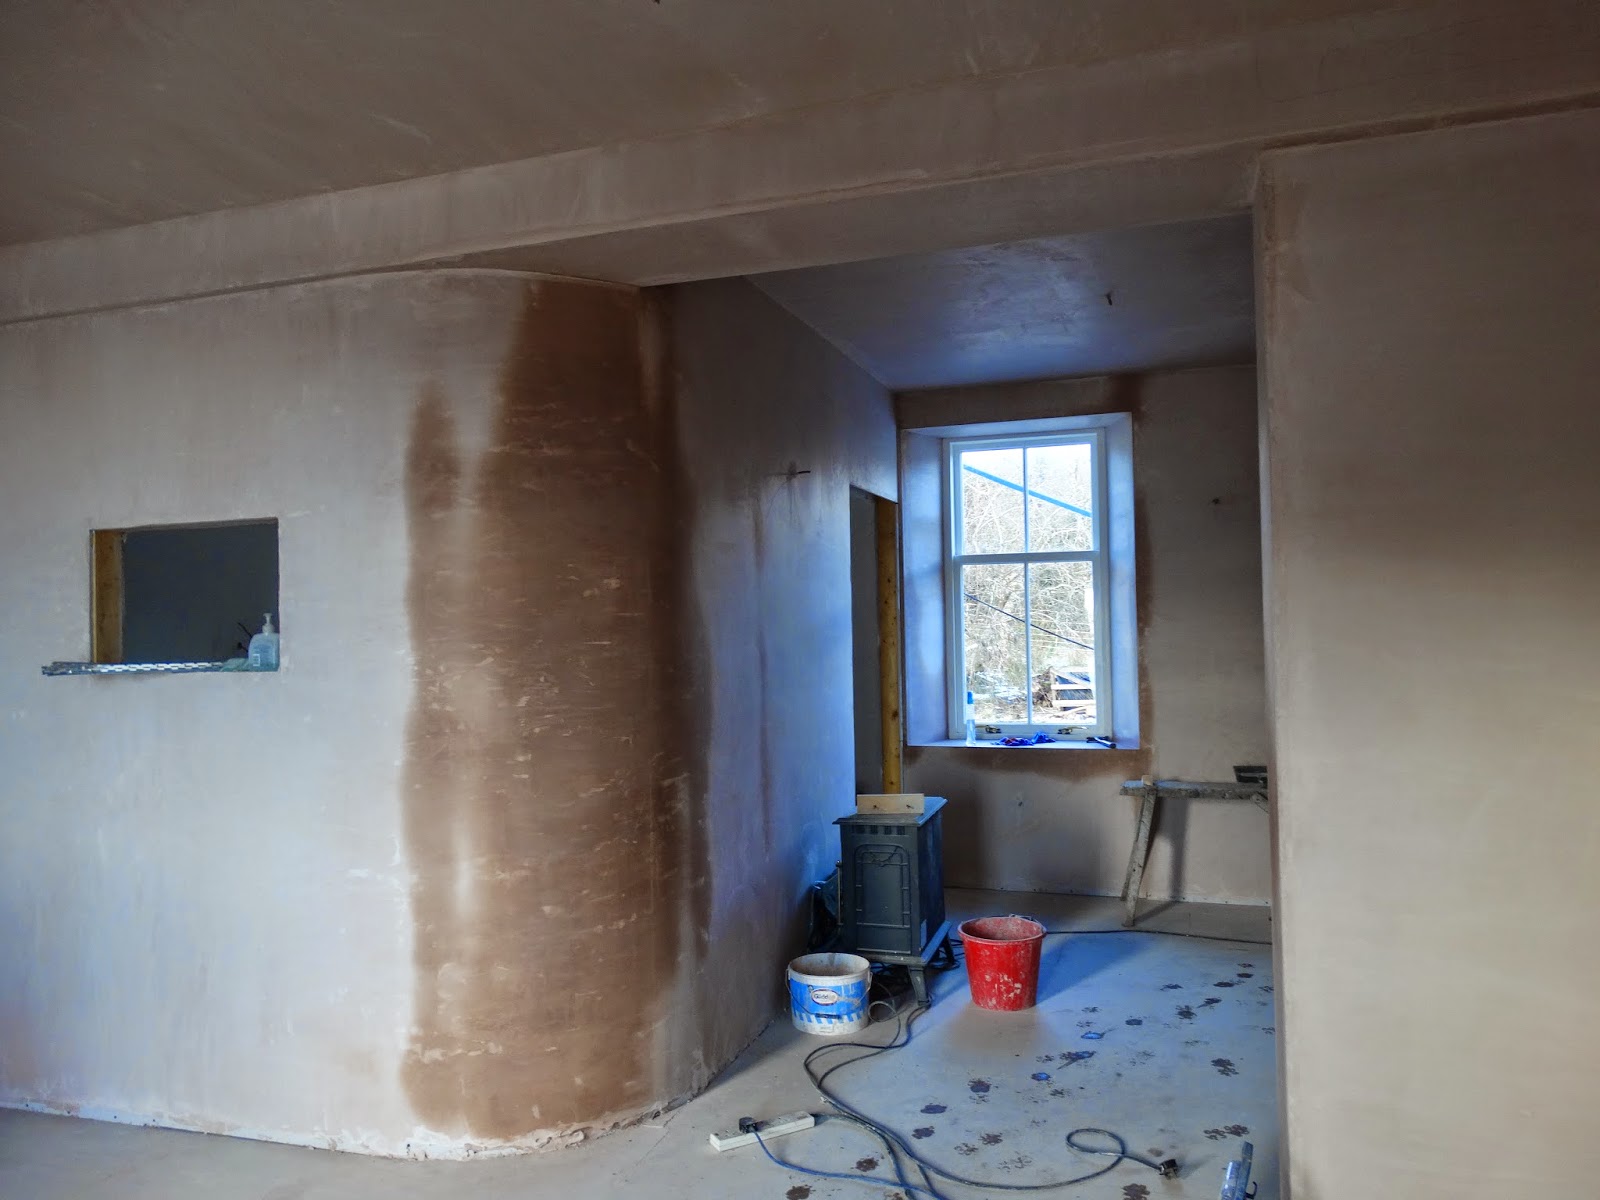
Looking from the doorway into the shower room around the curved wall.
The curved wall.
With a curved slate hearth to match.
Kitchen
Gary was midway through building the kitchen units.
View through the hatch.
This room used to be open plan, but as we are intending to do B&B, we decided that it probably wasn't such a good idea for the customers to be ale to see in just in case there were any kitchen disasters. It might not be too encouraging if Mary-Ann's swearing at the frying pan!
Disabled Unit
Nick's old workshop.
Which is now a separate unit.
These rooms have been specifically designed and built for disabled use. The section consists of a bedroom, with adjoining main room, very small kitchenette, and wet room.
Gary's curved door reveals.
Eventually... cupboard, kitchenette and wet room.
Bedroom 1
With a fireplace!
It's a little bit full of stuff at the moment as we have cleared out the second bedroom for Gary to work in while he puts on the doors.
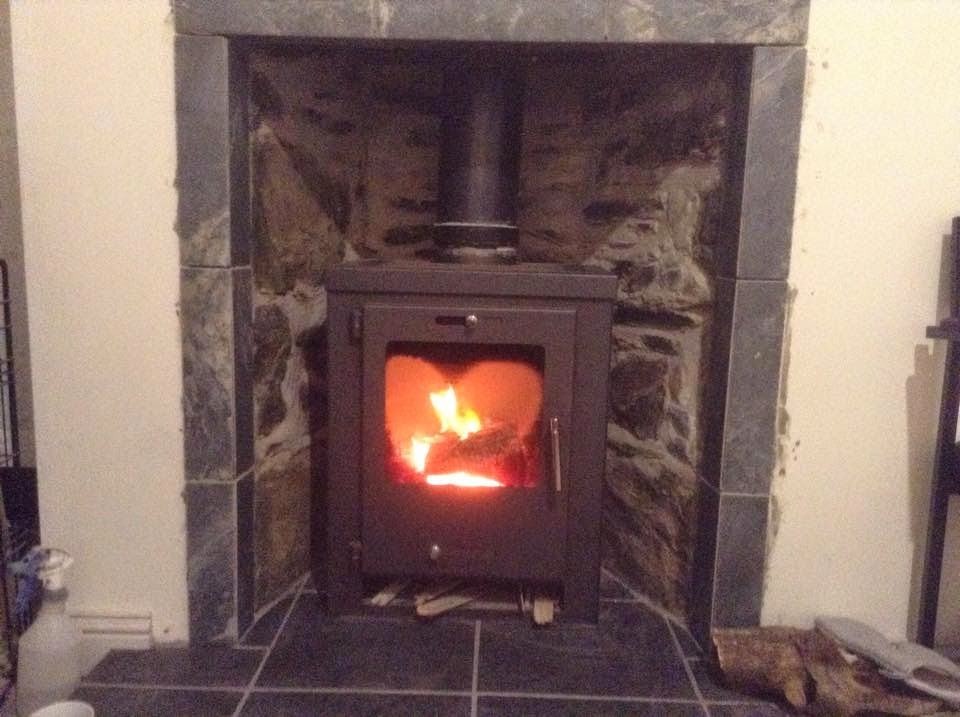
The wood burner was a happy mistake. We were originally going to leave this as an open fire, but when the wood burner for the sitting room arrived it turned out to be absolutely tiny! So we decided to use it in the bedroom instead. For one it's safer, but it also adds character and charm to the room.
Bedroom 2
Mary-Ann and Nick will have a separate unit upstairs, this is the bedroom, with ensuite.
En-suite
Some of the plumbing is now in place, the toilet works, you do have to flush it with a bucket though as there isn't currently a cistern! It did save us from having to walk all the way through into Sandy and Tom's end for a few months though.
Sitting Room and Kitchenette
Fireplace with chimney flue.
Now with tiles hearth and sides, and re pointed back. And a wood burner of course!
The kitchen just after Gary put on the worktop.
The room is much bigger than this, but I didn't take any photos of the messy bits!
The Main Bathroom
We had a temporary suite in for a while, but we put this new one in a few weeks ago. Mary-Ann is responsible for the expanding foam covered bath. There's nothing worse than a cold bath.
This is also the only room upstairs that Gary has put a final door on. Although Nick has already fitted door frames onto another 2 of the rooms.
Gary tiled the floor as well. None of us are very sure about the tiles, we bought them online, as you almost have to here, and in the pictures they looked blue, but when they arrived they're just white... We've changed the plans for the wall tiles to try and make it less clinical.. We'll see what happens.
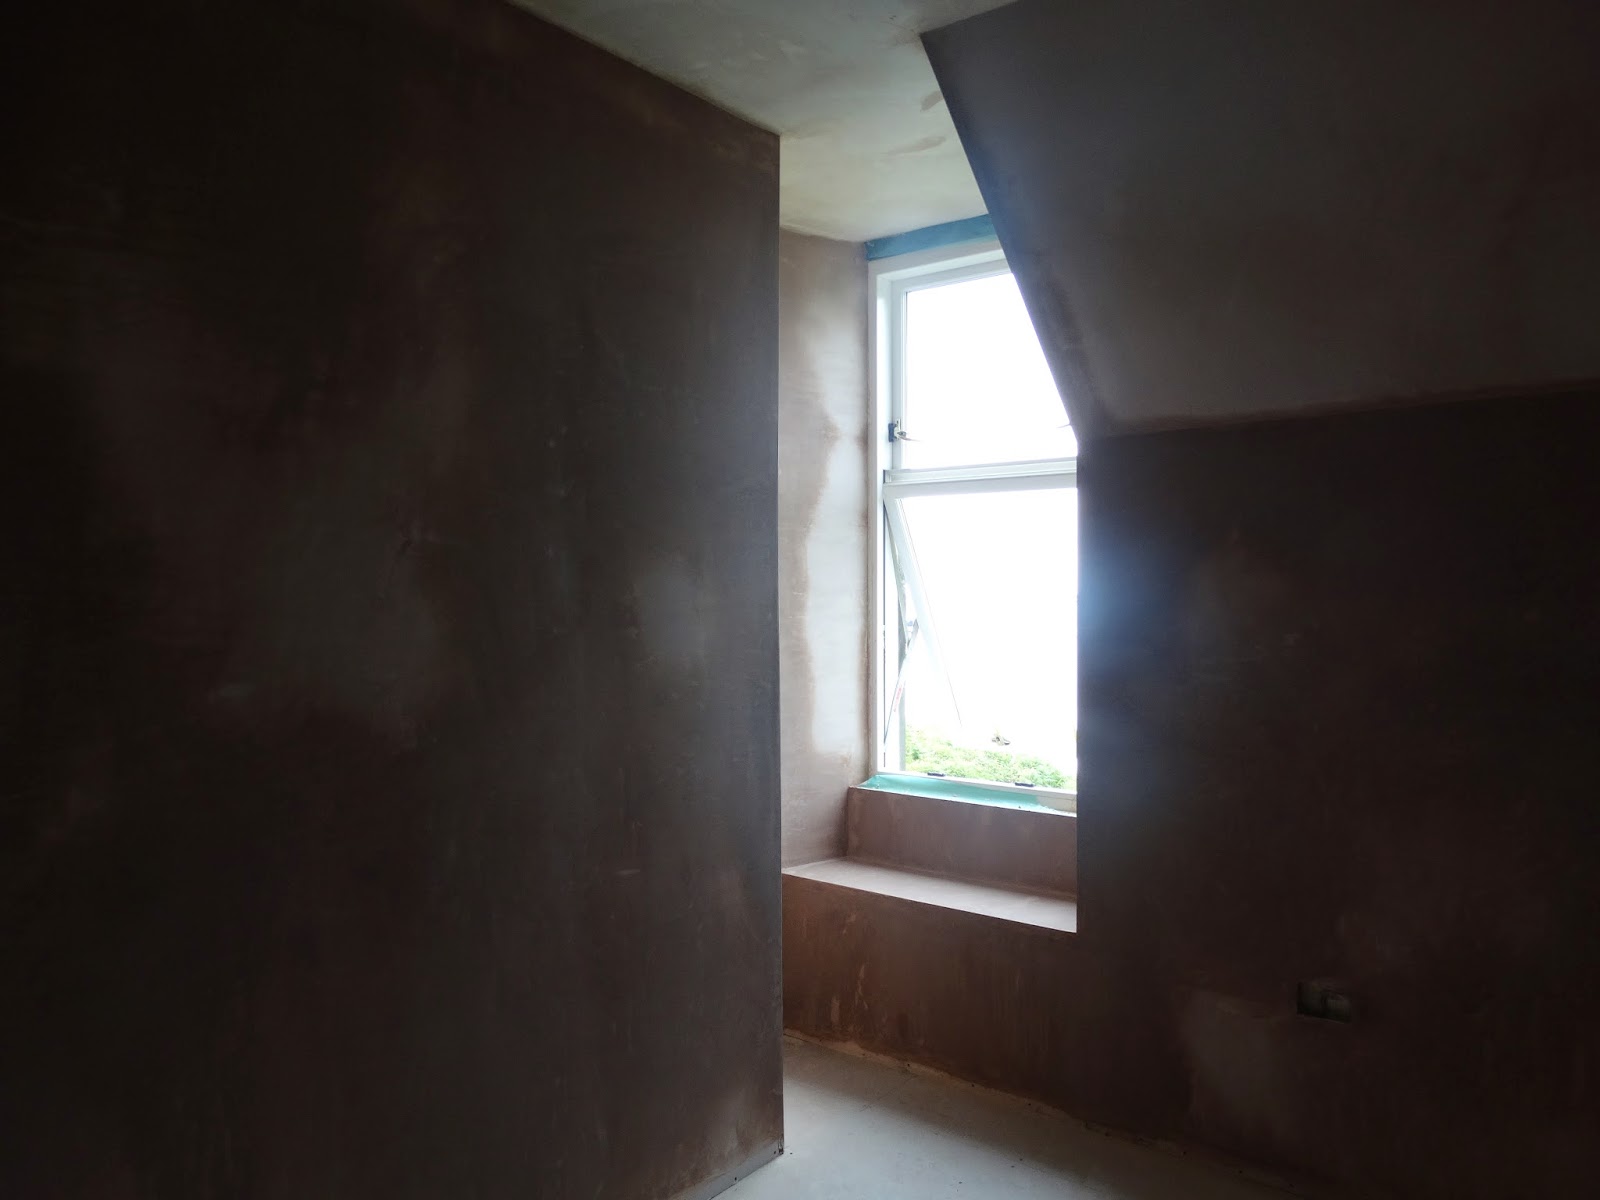
Bedroom 3
With window seat.
Mary-Ann and Nick moved into this bedroom once the plaster had dried and it had been painted.
Eventually they will be living in the 2nd bedroom.
The views even better with white walls!
The Corridor

You used to be able to walk from one end of the house, upstairs, straight down the corridor to the other side.
Things are a little different now thanks to the dividing wall..
I've missed a few rooms out of our side, simply because they were small, boring plastered rooms, the shower room and utility. I'm sure Mary-Ann will update you on them soon as things have been going on inside them...!
Inbetweens
February
With all the rain we had, we found that the tops of some of the dormers were leaking, so consequently tried everything we could think of.... Sealing the coping stones with mastic, re pointing the stonework...
...painting them with SBR.
I'm not sure what, if anything worked, but the problem seems to have fixed itself.
Trying out one of the upstairs fires.
Michael from Buildbase delivering all the insulation and plasterboard for upstairs on our side.
3 hours of lifting them up the stairs, one 25kg plasterboard dropped on my foot, a fair amount of cursing and a lot of laughter later, we finally had them all up. An impromptu meal at The Islay cheered us up a fair bit.
Since then we've had materials delivered in small batches.
In one particularly violent storm the scaffolding battens started blowing off. As we were waiting for it to be taken down anyway, we got up there and stripped off the battens before one went through a new window!
Donald Baker and some of his men came a few days later and took the rest down. Having had it up for over 6 months, this was a major milestone.
Nick fitting down pipes on the guttering.
March
Gary came back to do the framework in our side upstairs, but first Mary-Ann and Dan had to insulate between the rafters.
Once Gary and Nick had started the framework we quickly ran out of wood, so Mary-Ann borrowed Gary's van to do a quick run to buildbase. Gary asked me to go first but as I can't drive I figured it probably wasn't the best plan... I think Mum quite fancies herself as a van driver anyway!
Finished framework.
Unfortunately I then had to go around and fill up all the notches out of the joists..
On the bright side, after seeing Gary's chop saw, Nick wanted one for himself.
Nick digging a drainage ditch over the drive.
April
Tom and Adam setting up the base for their oil tank.
Currie's delivering yet more concrete for the water shed base, and Sandy and Tom's oil tank base.
Making concrete blocks with the left over concrete. Despite their higgledy-piggledy sides, Gary actually used them in the dividing wall!
May
4 new chimney flues.
Mary-Ann and Pauline moving chimney flues out of the shed in their giant boxes.
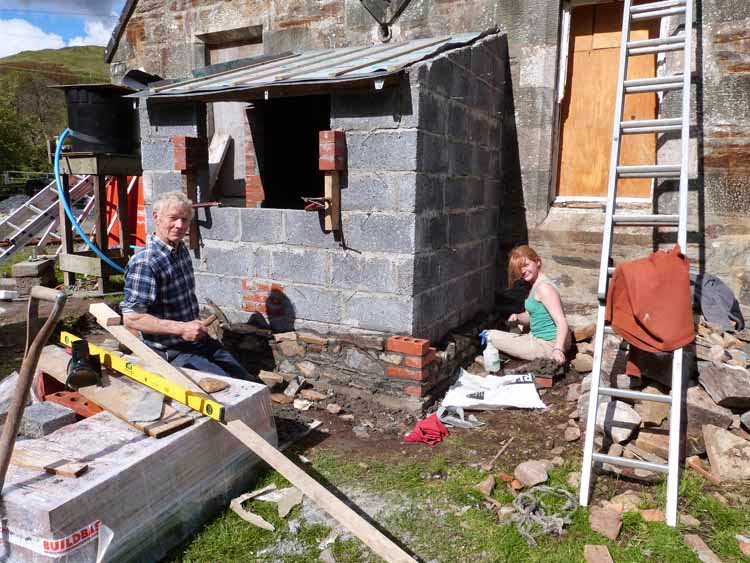
Nick building his shed for the water filters.
I joined in on the stone cladding, apparently this is taking the cream of the job... I'm making up for it now!
Gary and Islay took out the old dividing wall between the future 2 houses.
And built a new one.
June
Nick found the best way to demolish the old latte and plaster ceiling was to stamp on them from above. Lightly at first, just to knock off the plaster, then you can shovel it up without having to separate out the lattes. (long thin pieces of wood that are excellent kindling for the fire) Unfortunately you do get left with a scene like the one above, which is a bit depressing when you know that once it's done, you have to go back up and knock off all the wood and clear up all over again!
Gary came back again to do the porch roof once the weather was a bit better.
Adam and I attempted to the sort the slates, without much clue what we were doing. In hindsight, I think Gary must have had an awful lot of patience with us all to start with, I certainly didn't do very much right.
Nick pointing the outside of the porch.
With the scaffolding still up, we did the chimney flues at the same time.
Gary built one of his platform around the chimney stack.
Adam made a pretty funny film of the flues going in, which you can watch below.
The whole thing went surprisingly well considering, Mary-Ann and Gary stayed on the chimney stack, threading the flue down the chimney, Adam and Nick pulled on a rope tied to the end from the fireplace below, and I stood on the scaffolding in the middle and yelled between them. Honestly, yelling and screaming are what I'm best at!
While doing the porch we found out that Gary does rather a lot more than just roofing, and building walls, actually, excluding electrics, there's not really very much he doesn't do.
Putting floorboards down upstairs.
Gary putting up the first of the plasterboard.
It's so strange to see it looking like this... I'm sitting on our sofa right where Gary is standing!
Adam came up for a couple of weeks after he finished his university year. Turns out he's pretty good at insulation.
And destroying things.
Our electrician, Martin Armstrong, got to work on the first fix upstairs.
Nick mixing the first lot of plaster.
The first ceiling.
I managed to get almost every single plaster mix either too stiff or too runny. Gary ended up with either a sore arm or plaster all over his head...
The first fully plastered room.
When we first met Gary, we met him as a roofer, an incredibly good roofer, and someone who wasn't opposed to having us- a bunch of untrained, but willing labourers- working alongside him. It wasn't until later on that we found out that he can, essentially, do everything. Most people train in one, maybe two areas, you have a roofer, or a plasterer, or a joiner, or a brick layer, but Gary is all of those things. It took us quite a while to realise this, but once we did, we didn't look back.
While we were working on our side of the upstairs, Sandy and Tom's side got rather clogged up with everything that either didn't have a home or hadn't yet made it back to its home, so when, one Friday night Gary said he wanted it clear by Monday so he could start on the framework, I panicked just a little bit. Nick and Mary-Ann were both busy with other things, so it was down to me, which sounds dramatic, but at the time it was more than a little daunting. Being incredibly stubborn, I was also determined to get it done before Monday morning.
It was a bit depressing when Gary didn't start work in there until Tuesday.
July
Adam and Ben stripping out our 2nd temporary sitting room.
Martin came to do some of the first fix downstairs and the second fix upstairs.
Ben doesn't need a ladder to reach the ceiling!
Bob and Mark covering the shed.
As we had to clear the house out, Gary suggested building some temporary sheds outside to store everything in. Being temporary didn't quite happen, they're still up, still stuffed with stuff, but now leaking quite alot! The roofing felt is only supposed to be exposed to UV light for 3 months...
Gary showing Nick how to stick the plasterboard straight onto the block wall.
Ben spent most of his 3 week stay working. Sorry!
Bob and Mark receiving newly delivered floorboards.
Ben stripping out the floor in the future disabled unit.
Laying floorboards upstairs.
Lottie, Ben and Adam stripping out downstairs.
Adam and I frantically screwing up plaster boards, trying to keep up with Gary. I don't why I try really, I don't think it can be done.
Gary widening the doorway from our main room into the corridor.
August
Chiseling out the old lime mortar from our sides main fireplace ready for rendering.
Setting up the acros for the new supporting beam. When I first started working with Gary, he was forever telling me that I had to trust him, you have to trust the person you're working with. For me it was quite a big deal, after all, I am the girl who, at 15, had her tennis racket taken away because she was dangerous and uncoordinated with it, so when I'm having things thrown at me I didn't believe that I had any chance of catching them, or when there's solid, rotten, wooden lintel balanced precariously close to me, my first reaction is to move. Quick. I'm a lot better than I was now, in fact, with a little perseverance, Gary has taught me to catch pretty succesfully, and I'm not quite as jittery as I was with heavy objects... By the looks of this picture though, he obviously doesn't trust me!
The rest of us have though! Nick digging a hole for the water container.
Gary and I dug out the downstairs floors on our side, ready for new concrete.
Gary bought a breaker. I'm not sure he's actually had a chance to use it yet!
Sand blinding the floor ready for polythene.
Laying the polythene as a damp proof course.
Laying concrete in our downstairs floors.
Filling up an old chimney with concrete to eliminate the fire risk.
Nick spent days drilling holes through the wall for toilet and sink wastes.
Nick and Nigel taking nails from the lattes out of the joists.
My cousin, Jenny, riddling the stones out of sand for cement.
Once the floor was concreted that freed us up to start on the framework.
Mary-Ann's curved wall.
Blocking up old door ways.
Replacing windows.
Replacing the first of the old lintels.
Supporting the fairly rotten roof in the end sheds.
Newly rendered fireplace and concreted hearth.
Ready for our main wood burner- Nick's leaving present from work.
September
Gary building the pillars to hold the supporting beam.
Building the dividing wall between the houses.
Repairing the wall and replacing the lintels between Sandy and Tom's downstairs rooms.
Puzzling over the best way to repair a wall that's had so many alterations that it's more hole than wall.
Almost ready for concrete. Old floor dug out, leveled and sand blinded, temporary supporting beam in place, fire vent in, and a trench on the right is for extra strength beneath the 3 storey dividing wall. We then layed thick polythene as a vapour barrier the morning of the concrete arriving, there's no point doing it before you have to with 2 dogs running around!
It was hard working laying the concrete on such a hot day, with just Gary and I. (Mary-Ann and Nick were away in Lochgilhead.)
Ironically these old lintels are called 'safe wooden lintels' doesn't look very safe to me...
Temporarily propping up the joists while we replace a lintel.
Cutting the new lintels to size.
October
Andrew taking rubble out of the old blue room.
Mary-Ann painting upstairs.
Lee Cruikshank starting the plumbing.
Our first copper pipes.
Nick and Andrew using Nick's canoe water pump to get water out of the hole.
Nick dug a perfectly sized hole for the water tank. And then it filled with water...
November
Luckily Gary checked behind this bricked up fireplace for fire hazards as there is another fire on the other side of the wall. It seemed to have been used for a rubbish bin, with rubble, wood, and even an old Lagavulin milk carton hidden behind it.
We blocked it up and concreted behind.
This wall in the old hotel kitchen had been altered so many times that there really wasn't very uch wall left. Gary is strategically filling them in one by one. To do this you almost always have to knock some more out before you can fill it in, so we had to go at it carefully.
Cutting the old slates off the kitchen floor for hearths.
Cutting out the kitchen floor for the gas pipe.
The gas pipe, leading to the hob.
Nick's workshop base.
The time came again for Nick's workshop to move, this time to a permanent place, finally.
Up and running!
Putting up the first plaster boards in our main room.
Mary-Ann's pipe lagging.
The upstairs water tank.
The start of the second fireplace in our main room.
January & February
While Mary-Ann and Nick were away in January, Gary and I finished the plastering in our end downstairs. I have no idea how he managed to plaster 8 hours a day solidly for nearly a month, but he did, and by some miracle both arms are still attached.
Doors in place ready for Gary to build the units.
We reused the old kitchen cupboard doors that were in the house, when he has time, Nick's going to rub them down and paint them all. It might have to wait a while..
Gary building the units.
The first stages of plastering a curve.
Gary cutting off the ends of the coping stones.
The roof of one of the end sheds had been leaking all winter into what would be our utility, so after trying various patching up techniques that would make it leak proof until the weather was a little nicer, we decided to just bite the bullet and get on and do it. Most of the water seemed to be coming through the valley, understandably as the lead had holes in it all over where slates had come off the roof and hit it. The exit from the valley was also only about the width of 1/4 of the valley, so Gary suggested we cut off the ends of the coping stones to widen it.
Nick putting his boat repair skills to use.
Instead of putting in a new lead valley, we decided to use fibre glass as it is equally as strong and durable, as well as being significantly cheaper.
It's not often that Gary is the one watching.
It didn't last long though!
Gary slating the front side.
Gary went away for a couple of mornings on other jobs and left me to strip and felt the two middle roofs. Despite being pretty daunted by the prospect, I actually enjoyed myself enough that I did the front side the next day.
Originally we were just going to do the first 3 of the 4 roofs, but the weather held out enough for us to do the back as well. Anyway, it was quite a nice change from plumbing in sinks and appliances!
Setting up the waste pipe in the disabled unit wet room.
And Gary's on the other side...
For Nick, his workshop is his favourite place, full of all his tools set up in perfect order. After 2 years of temporary workshops, where everyone picks up his tools and leaves them outside/ in the damp/ somewhere hidden, with leaky roofs, and not enough space to swing a cat, we finally got around to building him a permanent one. If you live on Islay, or have visited recently, you've probably noticed it, for a while there it was quite hard to miss, with green roofing felt shining out like a beacon.
The shed itself is so posh it looks live some of sort of chalet. Nick, Mary-Ann and I laid the concrete base while Gary was on another job and once he was back, with Nick and I running around trying to follow instructions as quickly as we could, it was up in 3 days. This shed, built from scratch puts our other kit built sheds to shame..! Gary even built the windows and doors.
Nick setting up his workbench.
Gary giving Nick and I a Spanish slating tutorial.
We had intended to slate it at a later date, but unfortunately the roofing felt didn't hold up to much and once more Nick's tools were getting wet every time it rained, so we decided to slate it earlier rather than later. It has Spanish slate on the back as it's quicker, easier and we might not have had enough west highland for the whole thing. Gary gave Nick a quick lesson with the Spanish and then Nick slated it himself. Meanwhile Gary slated the other side with West Highland slate and I ran up and down the ladder 100 times an hour fetching things for him!
It's amazing how much can happen in a month, as I've said, I intended to publish this in February to mark our 2nd year here, that didn't quite happen, but with Adam pestering me every night I have finally done it! By now though, most of the photos are out of date, but I'll leave it to Mary-Ann to tell you all about what's been happening.
As always, thank you for bearing with me and getting to the end, and for supporting us. If anyone us ever passing, please feel free to come and have a look, there's nearly always someone around to give a quick tour. It's getting to the stage where we can show it off a bit more, rather than saying 'this will be..' or 'eventually we hope..' which is really nice.
Hopefully it'll publish now... Not crash.
Happy Mothering Sunday everyone. Thanks for putting up with us, Mum!
~Jenny














.jpg)




Wonderful, huge post! We drove past last September (no-one home?) and tried to find a way up your beloved Fairy Hill, unsuccessfully. Anyway, it was great to see it all IRL finally, on our first trip to Islay from Australia. Admire your tenacity, on the downhill run now!
ReplyDelete